
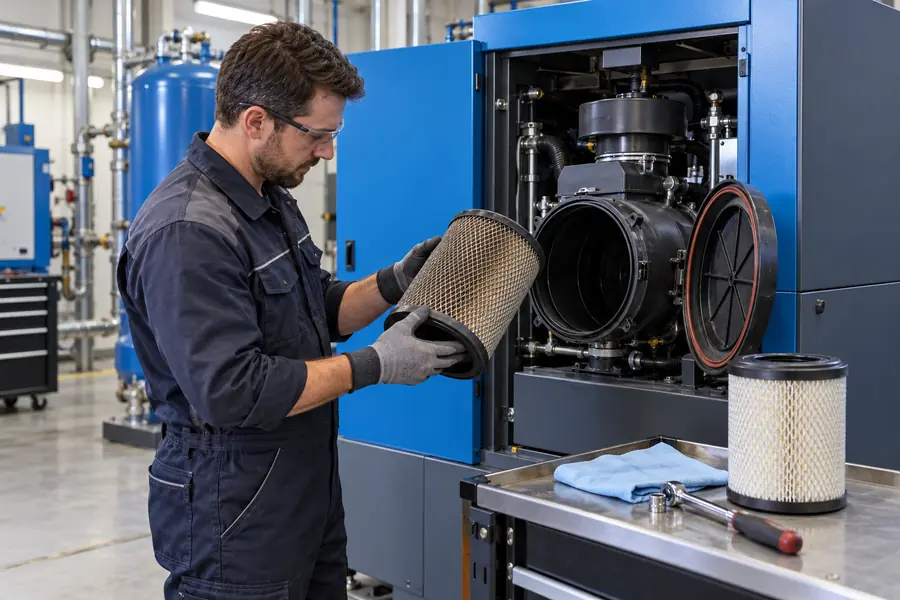
](https://kaishanpro.com/wp-content/uploads/2026/10/How-to-Clean-and-Replace-Air-Filters.webp)
Dirty air filters reduce compressor efficiency, restrict airflow, and allow contaminants to damage equipment. However, cleaning the wrong filter can be just as harmful as neglecting maintenance.
To clean and replace air compressor filters, first identify the filter type and check the manufacturer's instructions. Shut down and isolate the equipment, control stored energy, and confirm zero pressure before opening pressurized housings. Clean only elements specifically approved for reuse. Replace disposable intake, coalescing, activated-carbon, and fine filtration elements according to their service requirements.
Filter maintenance involves three separate tasks: cleaning filter housings, cleaning approved reusable elements, and replacing disposable elements. Each requires its own specific maintenance procedure.
What Types of Air Compressor Filters Need Cleaning or Replacement?
Air compressors use several filters to protect different components. Some clean incoming atmospheric air, while others remove contamination from air that has already been compressed.
The main air-compressor filter types include intake filters, particulate line filters, coalescing filters, activated-carbon filters, and specialized point-of-use filters. Intake-filter cleaning depends on its material and manufacturer approval. Most industrial compressed-air line-filter elements are replaceable consumables, while housings, drains, and certain reusable components can be cleaned during servicing.
1. Air intake filters
Main function: Protect the compressor pump or airend
The air intake filter is normally installed before the compression element.
It removes contaminants such as:
dust
dirt
sand
and:
airborne particles.
Without effective intake filtration, contaminants can enter the compressor and damage:
pistons
cylinders
valves
rotors
and:
bearings.
Atlas Copco explains that an overdue intake-filter replacement can reduce airflow and contribute to higher energy consumption and compressor-component wear.
Source: Atlas Copco — Compressor Parts That Need Maintenance
Common intake-filter materials include:
paper or cellulose media
synthetic media
foam
and:
specialized reusable designs.
However, the filter material alone does not determine whether cleaning is permitted.
A dry paper element should not automatically be washed or blown out.
I verify the manufacturer's instructions first.
2. Particulate compressed-air filters
Main function: Remove solid particles from the compressed-air line
Particulate filters protect downstream equipment from:
rust
pipe scale
dust
and:
other solid contamination.
They may be installed:
before a dryer
after a desiccant dryer
or:
near a sensitive point of use.
Their cleaning and replacement requirements depend on the element construction.
Most disposable fine-particulate elements are replaced rather than washed.
Certain specialty industrial process filters, such as particular stainless-steel designs, may be reusable under validated cleaning procedures.
I never assume reusability merely because an element looks metallic.
3. Coalescing filters
Main function: Remove fine liquid aerosols
Coalescing filters remove very small droplets of:
water
and:
oil.
They work by capturing fine aerosols and combining them into larger droplets.
These droplets collect in the filter housing and are removed through a drain.
Coalescing filtration is especially important before:
desiccant dryers
and:
oil-sensitive equipment.
Atlas Copco's compressed-air filtration guidance states that coalescing elements must be replaced at the recommended service interval to maintain filtration performance and limit pressure drop.
Source: Atlas Copco — When to Change Your Compressed Air Filter
I do not recommend washing or reusing disposable coalescing elements.
4. Activated-carbon filters
Main function: Reduce oil vapor and certain odors
Activated carbon removes selected gaseous contaminants through adsorption.
As the carbon becomes saturated, its adsorption capacity decreases.
A significant challenge is that an exhausted carbon element may not produce a large pressure-drop increase.
Donaldson notes that activated-carbon replacement depends on contaminant loading and recommends a six-month replacement interval for its specified industrial activated-carbon elements.
Source: Donaldson — Process Filtration FAQs
For this type, routine washing is not a suitable way to restore adsorption capacity.
5. Compressor oil filters and separators
An oil-injected rotary screw compressor may also contain:
oil filter
and:
air-oil separator element.
These components are not the same as:
air intake filters
or:
downstream line filters.
Their purpose is to maintain compressor lubricant cleanliness and separate lubricant from compressed air inside the compressor system.
They normally follow specific replacement schedules.
I do not treat them as washable air filters.
Filter maintenance comparison
| Filter type | Main purpose | Cleaning or replacement |
|---|---|---|
| Intake filter | Protect compressor | Clean only if OEM-approved; otherwise replace |
| Reusable foam intake filter | Protect compressor | Clean and dry using approved method |
| Disposable dry intake filter | Protect compressor | Replace unless OEM explicitly permits cleaning |
| Particulate line filter | Remove solids | Usually replace |
| Coalescing filter | Remove water/oil aerosols | Replace element |
| Activated-carbon filter | Remove vapor/odor | Replace when due or exhausted |
| Desiccant afterfilter | Capture desiccant dust | Replace according to specifications |
| Oil filter | Clean compressor lubricant | Replace |
| Air-oil separator | Separate lubricant from air | Replace |
The first maintenance rule is simple:
Identify the exact element before choosing a cleaning method.
How Do I Clean an Air Compressor Intake Filter Safely?
An intake filter may be reusable or disposable. Cleaning is appropriate only when the manufacturer specifies a method that will not damage the filtration media or compromise its seals.
To clean an approved reusable intake filter, stop and isolate the compressor, open the intake housing according to the service manual, prevent dirt from entering the clean-air passage, and inspect the element. Use only the approved cleaning method, allow complete drying where required, and reinstall the element with properly seated seals. Replace damaged or nonserviceable elements.
Step 1: Shut down the compressor
Before opening the intake-filter housing, stop the compressor using the prescribed shutdown procedure.
For any work involving exposure to moving parts or unexpected startup, follow the required hazardous-energy isolation procedure.
Depending on the machine, hazards may include:
electrical energy
automatic restart
moving belts
cooling fans
and:
stored compressed air.
OSHA 29 CFR 1910.147 requires appropriate control of hazardous energy during covered servicing activities.
Source: OSHA — Control of Hazardous Energy
I do not remove filters from a running compressor.
Step 2: Locate the intake filter
Typical locations include:
beside the piston compressor pump
inside a rotary screw compressor cabinet
or:
inside a separate air-cleaner housing on a portable compressor.
The filter may be accessible by removing:
housing clips
a threaded cover
or:
a service panel.
The exact design varies.
I follow the OEM access instructions.
Step 3: Prevent dirt from entering the compressor
This is one of the most important steps.
Before exposing the clean-air side, remove loose dust around the outside of the housing using an approved method.
When removing the filter:
Do not shake dust into the intake opening.
Contamination entering an exposed compressor intake can damage internal components.
If the housing is particularly dirty, I clean the surrounding area before proceeding.
Step 4: Inspect the filter element
I look for:
tears
collapsed pleats
damaged end caps
loose seals
oil contamination
and:
excessive dust accumulation.
A damaged filter should be replaced.
It should not be cleaned and returned to service.
Step 5: Use the correct cleaning method
This is where filter type matters most.
For an OEM-approved washable foam filter:
Use the cleaning product and procedure specified by the manufacturer.
Allow the element to dry completely.
If the design requires filter oil, use the specified oil and application method.
Do not install a wet filter unless the instructions expressly require it.
For an OEM-approved cleanable dry element:
Use only the manufacturer's specified method.
Some designs permit controlled vacuum cleaning or carefully regulated air cleaning.
However, high-pressure air can damage filter media, drive contamination deeper, or compromise filtration performance.
I do not recommend compressed-air blowout as a universal cleaning technique.
For a disposable dry element:
Replace the element.
Do not wash it in water or solvents.
Do not assume that blowing away visible dust restores its original filtration performance.
Kaeser's portable-compressor maintenance guidance explicitly directs users to clean intake elements only according to manufacturer recommendations and to inspect filter condition and seals.
Source: Kaeser — Portable Compressor Maintenance
Step 6: Clean the housing
The housing may contain:
loose dust
sand
or:
other debris.
I clean the housing using:
a lint-free cloth
or another approved method.
The important goal is to prevent any loosened material from entering the compressor.
If moisture or oil is present unexpectedly, I investigate its source.
Step 7: Check the seals and reinstall
I inspect:
filter gasket
housing seal
mounting surface
and:
cover condition.
The filter must sit correctly in its designated position.
A poorly seated element can allow unfiltered air to bypass the filtration media.
I confirm:
correct orientation + secure housing + intact sealing surfaces.
Step 8: Verify operation
After reassembly and completion of the manufacturer's return-to-service procedure, I check:
air-filter restriction indicator
airflow performance
abnormal suction noise
and:
housing condition.
If the compressor has an intake-filter restriction indicator, I reset it only as required by the manufacturer's procedure.
I record the service date and equipment hours.
My intake-filter maintenance checklist
| Inspection point | What I check |
|---|---|
| Filter media | Dust, holes, tears, collapse |
| End caps | Cracks or deformation |
| Gasket | Damage or incorrect seating |
| Housing | Dust and contamination |
| Intake passage | No debris introduced |
| Cleaning method | Explicit OEM approval |
| Reinstallation | Correct fit and orientation |
| Performance | Normal intake restriction |
| Maintenance record | Date and operating hours |
The critical principle is:
A visually cleaner filter is not necessarily a properly functioning filter.
How Do I Replace Compressed-Air Line Filter Elements?
Compressed-air line filters operate inside pressurized housings. Safe replacement requires isolating the filter, relieving trapped pressure, installing the correct element, and restoring pressure carefully.
To replace an inline compressed-air filter, isolate the filter housing from the compressed-air supply, safely release trapped pressure, and verify zero pressure. Open the housing according to the manufacturer's instructions, remove the used cartridge, inspect the bowl and seals, install the correct replacement, reassemble, and slowly restore pressure while checking for leaks and correct operation.
Step 1: Identify the correct replacement element
Before starting, I confirm:
filter manufacturer
housing model
element part number
filtration grade
and:
required air quality.
A filter may be designed for:
general particulate removal
fine oil aerosol removal
or:
oil-vapor adsorption.
Elements with similar dimensions can have different performance characteristics.
I do not substitute one grade for another simply because it fits inside the housing.
Step 2: Isolate the compressed-air supply
A pressurized filter housing can contain significant stored energy.
The correct procedure normally requires:
isolating the upstream air supply
and:
protecting against pressure entering from downstream.
Some installations have isolation valves on both sides.
Others require a more extensive shutdown.
I follow the specific equipment design.
Step 3: Fully depressurize the housing
After isolation, the housing must be safely vented using its designated depressurization arrangement.
Before loosening the bowl or cover, verify:
zero pressure at the filter housing.
Never assume that shutting off the compressor automatically depressurizes the filter.
Air may remain trapped in:
receivers
pipes
and:
filter bowls.
Atlas Copco specifically warns against loosening a filter bowl on a live compressed-air line.
Source: Atlas Copco — Compressed Air Filter Replacement
Step 4: Remove the filter housing bowl or cover
Filter housings use different designs.
Some have:
threaded bowls
while others have:
locking mechanisms
or:
bolted covers.
I support the housing components and follow the manufacturer's removal instructions.
A bowl that does not release normally may still contain pressure or have a mechanical fault.
I never force a pressurized housing open.
Step 5: Remove the old element
The used cartridge may contain:
water
oil
dust
and:
other process contaminants.
I remove it without spreading contamination onto the clean-air side of the housing.
For disposable elements:
remove → inspect → dispose according to the applicable requirements.
I do not attempt to restore a used coalescing cartridge by washing or blowing it with compressed air.
Step 6: Inspect the housing and seals
I check:
bowl condition
gasket condition
element seats
O-rings
thread or locking surfaces
and:
drain mechanism.
Donaldson recommends replacing housing gaskets when filter elements are replaced because seals can deteriorate or deform during service.
Source: Donaldson — Process Filtration FAQs
If the replacement kit includes new seals, I install them according to the instructions.
Step 7: Clean the housing
The empty housing may be cleaned using an approved method.
For many filter designs, this means:
wiping accessible surfaces with a clean lint-free cloth.
I avoid aggressive solvents or chemicals unless the housing manufacturer approves them.
Certain plastic bowls and sealing materials are sensitive to chemicals.
Cleaning the housing does not mean cleaning the disposable filter media.
Step 8: Check the condensate drain
This is especially important for:
coalescing filters.
A functioning element may capture liquid successfully, but that liquid still needs to leave the housing.
A blocked drain can cause:
condensate buildup
liquid carryover
and:
poor downstream air quality.
I inspect:
automatic drain operation
drain outlet
and:
seal condition.
Some manufacturers recommend replacing float drains together with the filter element.
Step 9: Install the new element
I verify the new cartridge's:
part number
orientation
sealing condition
and:
correct seating.
I avoid damaging delicate media during handling.
The new filter should be installed according to the manufacturer’s seating and tightening instructions.
Step 10: Restore pressure carefully
After reassembly, the filter system can be returned to service under the approved procedure.
Pressurization should be gradual where specified.
Rapid pressure surges can damage filtration media or other components.
I verify:
no leaks
normal drain operation
normal differential pressure
and:
required air quality.
If the filter leaks or does not function correctly, I remove it from service and correct the issue.
Inline filter replacement summary
| Stage | Main requirement |
|---|---|
| Preparation | Verify replacement element |
| Isolation | Block all unintended pressure sources |
| Depressurization | Confirm zero pressure |
| Removal | Open housing safely |
| Inspection | Check seals, bowl, drain |
| Cleaning | Clean housing, not disposable media |
| Replacement | Install approved cartridge |
| Reassembly | Follow OEM sealing instructions |
| Return to service | Repressurize safely |
| Verification | Check leaks, drains, pressure drop |
The most important rule is:
Never open a compressed-air filter housing while it is pressurized.
How Often Should Air Filters Be Cleaned or Replaced?
There is no universal interval for every air compressor filter. Maintenance frequency depends on filter type, manufacturer requirements, contamination levels, operating hours, and required air quality.
I replace air-compressor filters according to the OEM schedule and their actual condition. Intake filters may require earlier attention in dusty environments. Many industrial compressed-air line-filter manufacturers recommend replacement at least annually, while certain activated-carbon filters require shorter intervals. Excessive restriction, damage, contamination, and air-quality problems can justify earlier replacement.
Air intake filter replacement intervals
Intake-filter life depends heavily on:
dust concentration
operating environment
compressor duty
and:
filter design.
For example, a compressor operating in a clean indoor workshop may experience much less intake contamination than one working at:
a mine
a cement plant
or:
a quarry.
Kaeser's portable-compressor maintenance guidance includes regular inspection of the intake-filter restriction indicator and a replacement interval of approximately 500 operating hours for the relevant portable equipment maintenance program.
That is a model/application-specific example, not a universal schedule for all compressors.
Source: Kaeser — Portable Compressor Maintenance
Other compressor models can have very different service intervals.
Compressed-air line filter replacement intervals
For many industrial inline filters, a calendar-based replacement schedule is appropriate.
Atlas Copco recommends replacing its industrial compressed-air line-filter elements at least every 12 months to maintain specified filtration performance, with earlier replacement in demanding environments.
Source: Atlas Copco — When to Change Your Compressed Air Filter
Donaldson also publishes manufacturer-specific replacement recommendations for industrial particulate, coalescing, and activated-carbon elements.
The actual maintenance plan should follow the installed filter's technical manual.
Activated-carbon filters may need more frequent replacement
Activated carbon has a finite adsorption capacity.
Once exhausted, it may no longer effectively remove the intended contaminants.
Importantly:
low pressure drop does not prove the carbon is still effective.
Donaldson recommends replacing certain industrial activated-carbon elements every six months.
Other products may have different service-life requirements.
I follow the manufacturer's interval and consider actual contamination loading.
Differential pressure is useful but not the only indicator
Differential pressure measures resistance across a filter.
In general:
Higher pressure drop → greater flow restriction.
A heavily loaded filter can restrict airflow and increase compressor energy use.
However, pressure drop alone does not reliably indicate whether all filtration media remain intact.
Atlas Copco warns that a torn element may show unexpectedly low pressure drop because air bypasses the damaged media.
Therefore, I use:
service interval + differential pressure + contamination history + air-quality requirements.
Not just one indicator.
Warning signs that a filter needs attention
Common symptoms include:
reduced airflow
higher pressure drop
air-quality deterioration
increased dust contamination
oil carryover
water downstream
damaged filter seals
and:
maintenance alarms.
But these symptoms can also result from:
dryer problems
failed drains
air leaks
or:
compressor faults.
I confirm the cause before replacing parts unnecessarily.
Common maintenance mistakes
Mistake 1: Washing a disposable element
Water or detergents can damage specialized filter media.
Mistake 2: Using high-pressure air on an unsupported filter
This can tear filtration material or force contaminants deeper into the media.
Mistake 3: Reinstalling a damaged gasket
Air may bypass the element or leak from the housing.
Mistake 4: Ignoring automatic drains
A coalescing filter cannot protect the system effectively if collected liquid is not discharged.
Mistake 5: Waiting only for a red differential-pressure indicator
The element's specified service life and filtration integrity also matter.
Mistake 6: Using an incorrect replacement element
A physically compatible element may not meet the intended filtration grade.
Mistake 7: Opening a pressurized housing
This creates a serious risk of sudden pressure release.
Mistake 8: Failing to document replacement
Without maintenance records, elements may remain in service beyond the recommended interval.
Practical maintenance table
| Filter | Inspection basis | Replacement guidance |
|---|---|---|
| Intake filter | Restriction, dust, damage, OEM schedule | Model-specific |
| Reusable intake filter | Approved cleaning method, condition | Replace when damaged or due |
| Particulate line filter | Service date, pressure drop, air quality | Often annual; check OEM |
| Coalescing filter | Service date, condition, drainage | Often annual; check OEM |
| Activated-carbon filter | Time, contamination exposure, air quality | Often shorter; check OEM |
| Desiccant afterfilter | Dust loading, service schedule | OEM-specific |
| Oil filter | Compressor service schedule | OEM-specific |
| Air-oil separator | Differential pressure, service schedule | OEM-specific |
I consider these maintenance intervals part of the complete compressor operating plan.
My insights: How to Clean and Replace Air Filters
The most important maintenance distinction is knowing whether an element is designed to be cleaned or replaced. A successful filter service must protect air quality, compressor reliability, and technician safety.
To clean and replace air compressor filters correctly, I first identify the filter type and its service instructions. I clean only reusable elements approved by the manufacturer, replace disposable precision filter media, inspect housings and seals, verify condensate drainage, and restore equipment safely after confirming proper isolation and zero pressure where applicable.
My first insight: Not every dirty filter should be cleaned
This is the most important lesson.
A dirty:
reusable foam intake filter
may be suitable for cleaning.
A dirty:
coalescing element
normally requires replacement.
A saturated:
activated-carbon element
usually requires replacement because cleaning does not restore its original adsorption capacity.
Therefore, I do not use one cleaning procedure for all filters.
My second insight: Cleaning the housing is different from cleaning the filter
Even when the element must be replaced, the housing can still require cleaning.
I distinguish:
housing → clean and inspect
seals → inspect and replace as specified
drains → inspect and service
disposable cartridge → replace.
This prevents confusion between cleaning a filter assembly and reusing its filtration media.
My third insight: Poor filtration can increase operating cost
A blocked intake filter can reduce compressor output.
A restricted line filter can increase:
pressure drop.
The compressor may need to operate at a higher pressure to maintain adequate downstream air.
Atlas Copco notes that unnecessary pressure drop through compressed-air filters can increase energy consumption and recommends timely replacement to maintain system performance.
Source: Atlas Copco — Compressed Air Filter Replacement
This is why filter maintenance is not just a cleanliness issue.
It is also an:
energy-efficiency issue.
My fourth insight: A complete filter service includes seals and drains
Replacing only the cartridge may not solve an air-quality problem.
A damaged:
O-ring
can create a bypass or air leak.
A blocked:
condensate drain
can allow liquid to accumulate.
A dirty:
housing
can contaminate the clean side during reassembly.
I therefore inspect the entire filter assembly.
My fifth insight: My practical process for cleaning and replacing air filters
When someone asks me “How to Clean and Replace Air Filters”, I use this sequence:
1. Identify the filter location.
Compressor intake?
Compressed-air line?
Inside the oil circuit?
Point of use?
2. Identify the element type.
Foam?
Paper?
Synthetic?
Coalescing?
Activated carbon?
3. Check the OEM manual.
Confirm cleaning approval and replacement interval.
4. Prepare the correct replacement parts.
Match the exact element specification.
5. Stop and isolate the equipment.
Control electrical, mechanical, and pneumatic energy as required.
6. Verify zero pressure where necessary.
Never open a pressurized filter housing.
7. Protect the clean-air side.
Prevent loose dirt from entering the system.
8. Inspect the element.
Look for damage, contamination, and media deterioration.
9. Decide whether to clean or replace.
Clean only if specifically permitted.
10. Clean the housing.
Use the approved method.
11. Inspect seals.
Replace damaged or scheduled seals.
12. Check condensate drains.
Especially on coalescing filters.
13. Install the serviced or replacement element.
Verify correct orientation and seating.
14. Reassemble the housing.
Follow OEM instructions.
15. Restore pressure and power safely.
Use the approved return-to-service procedure.
16. Verify performance.
Check restriction, leaks, drain function, and air quality where relevant.
17. Record the service.
Document the date, hours, parts, and observations.
My final decision guide
| Situation | My recommendation |
|---|---|
| Washable filter, OEM-approved | Clean using specified method |
| Disposable intake filter | Replace |
| Torn or damaged filter | Replace |
| Coalescing filter at service interval | Replace |
| Activated-carbon filter exhausted | Replace |
| Dirty housing | Clean with approved method |
| Damaged sealing gasket | Replace |
| Blocked condensate drain | Service or replace |
| High filter pressure drop | Investigate and replace if required |
| Filter housing still pressurized | Do not open |
My final rule is:
Clean only what is designed to be cleaned. Replace what is designed to be replaced.
That principle protects the compressor and helps maintain the required compressed-air quality.
Conclusion
Effective filter maintenance starts with identifying the element. Clean only approved reusable filters, replace disposable media, inspect seals and drains, and always follow safe isolation procedures.